Sweat-Proof and Tear-Proof Makeup Tutorial
Hey Everyone!
Today I'm going to be showing you how to create
this gorgeous look that's sweat-proof and tear-proof.
First off I want to say that this isn't going to stay no
matter what. It's more of a water resistant look. If you
are going to be swimming for hours or crying nonstop,
then some of the color may fade or kind of shift around.
No makeup look is 100% water proof, it just resists
and won't move around quite as much as other
ways of wearing makeup.
Video:
Products Used:
Urban Decay -
Naked 2 Palette
Maybelline -
Color Tattoo:
Tough as Taupe
Rimmel -
Match Perfection Concealer:
Fair/Light (230)
Flower Beauty -
Cream Blush:
Pure Petunia
Rimmel -
Kohl Pencil Eyeliner:
Black
Salon Perfect -
Brow Kit
Sally Hanson -
Eyelash Curler
L'Oreal -
Water-Proof Mascara:
Black
Rimmel -
Lipstick:
Airy Fairy
NYX -
Butter Gloss:
Vanilla Creme Pie
EYES:
Step One:
To prime the eyelid and give it a nice base for
the shadows that will go on top, I used this
Maybelline Color Tattoo in Tough as Taupe.
I used a clean finger to apply it all over my
eyelid and then used a stiff blending
brush to help blend the color out.
Step Two:
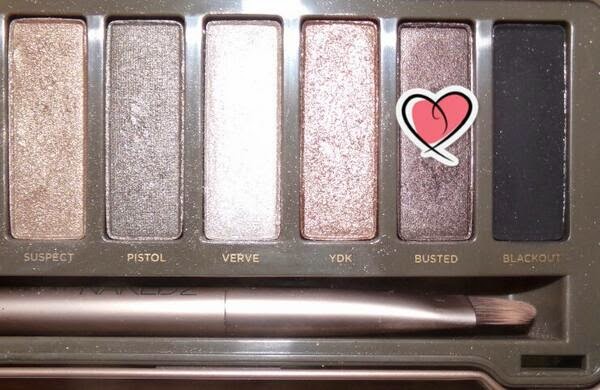
Going to my Urban Decay Naked 2 palette, I
used the color Tease and applied it all over
the lid to set the cream eyeshadow base.
Tease is a matte grey taupe that is almost
the same exact color as the Maybelline
Color Tattoo that I used as a base.
Step Three:
Taking the light metallic silver called Verve, I
applied it lightly to the ball of the lid and
a bit into the inner corner.
Step Four:
Going in with a fluffy shader brush, I took this
dark purply brown shade into the outer v and
through the crease to add some depth.
Step Five:
Next I first took the shade Foxy and put it in
the inner corner and brow bone to lighten and
then took the color Bootycall to highlight
and add some shimmer.
Step Six:
To finish off the eyes, take a black kohl eyeliner
pencil and tight line your eyes. This is when you
put eyeliner on the waterline but on your upper
lash line. Then, curl your lashes and apply a few
coats of your favorite waterproof mascara.
FACE:
Step One:
Since this look is sweat and tear resistant, we don't
want to cake on the face makeup. I myself have pretty
decent skin so I don't need much coverage. I just used
a concealer under the eyes and on any blemishes or
redness that I want to cover up. But, if you don't have
the best skin and need more coverage, I'd say go for
a BB or CC cream along with the concealer in problem
areas. It will give you the extra needed coverage, but
won't be quite as caky as a full on foundation. If you
have really oily skin I would suggest using a pressed
powder to set your makeup as well. I have pretty
oily skin but skipped that step so I wouldn't
have as much makeup on my face.
Step Two:
To add some color to the face I used this gorgeous
cream blush. Using all cream products will help your
makeup stay all day. Powders fade and move around
on your face more easily than a cream or liquid
so keep that in mind.
Step Three:
To finish off and tie everything in together, fill
in the brows. If you've never done this before you'll
be surprised of the difference it makes. It really just
helps everything flow together and look polished off.
I use a combination of the two darkest colors since
I have naturally dark hair and eyebrows. To fill them
in I used the angle brush the kit comes with and then
brush them into place with the other end of the angled
brush. To set them in place, I used the wax stick.
More Pictures:
And That's It!
I really hope you enjoyed this and found it helpful.
If you have any suggestions, questions, or even just a
something you want to tell me, let me know in the
comments down below. Also, don't forget to follow my
blog so that you can know when I have a new post up
and share! It would mean the world to me if you do :)
xoxo,
Wren


0 comments