Dusty Road | Current Go To Makeup Look


Above is my most recent YouTube video. I show you my most recent go to makeup look. It's super simple, easy, and moderately natural (a bit bold but using neutral colors for the eyes) For a more detailed, step-by-step tutorial with close up product shots and swatches keep reading!
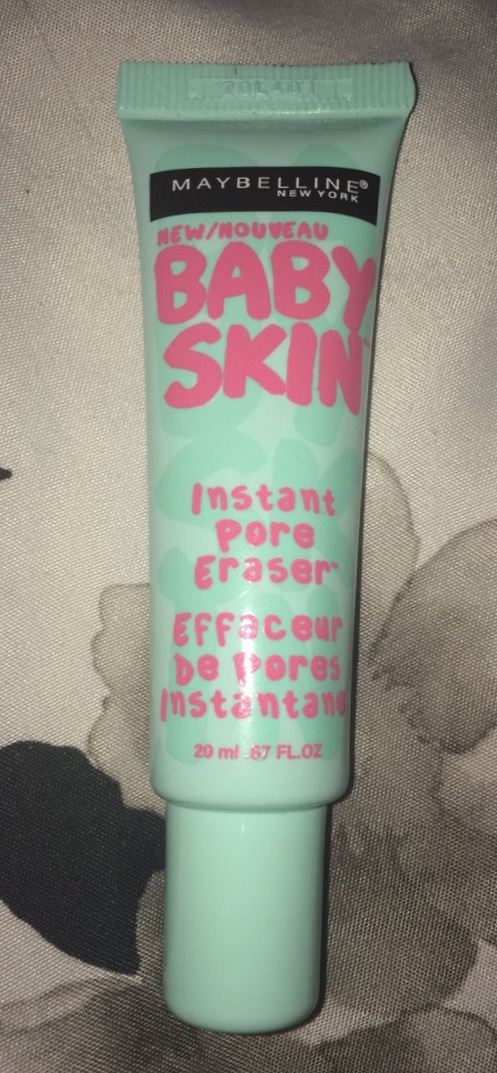
To start off I used my 'Baby Skin' face primer from Maybelline New York. With a small amount, I used my finger tips to apply it all over my face so that the rest of my makeup has a nice base to start with. I've used this a few times and I don't really like it. I have quite large pores and it does nothing for them. Am I supposed to let it set or something? A lot of over beauty gurus have used this and love it but I guess I'll just have to continue on my search for something to minimize my pores. Maybe I need to change my skin care routine to focus on my pores more? If you have any product suggestion, makeup or skin care, PLEASE let me know!

I next apply my Maybelline 'Fit Me' concealer in 15 Fair in a triangular shape under my eyes to cover any dark circles. This shade is really great because it's close enough to my skin shade that it doesn't highlight much so it can still be used on spots!

My skin likes to be nice and red, especially around my nose, so to cover it up I turn to my Coastal Scents 'Eclipse Palette' and use the green shade. Green is opposite red on the color wheel so they cancel each other out. I apply this all around my nose and a bit on my chin since I get a bit red there sometimes too. I lightly blended them together with my fingertips but then brought in my Sigma F80 Flat Kabuki brush to blend it even more and better. Then I go back to my Maybelline 'Fit Me' Concealer in 15 Fair to highlight a bit down the bridge of my nose, cheekbones, and forehead and then use my F80 to blend those in a bit.

Heading back to my trusty 'Eclipse Palette' from Coastal Scents, I use the darkest shade to contour. I slowly apply little by little in the hollows of my cheeks, the sides of my nose, around my temples, and at my hairline. You don't want to apply too much if you're super pale like me so that's why I take a while and apply a small amount and build it up. To apply it I used my Sigma F75 Concealer brush. It's the perfect size for me, not too big, but not too small. I also go back in with my Maybelline 'Fit Me' concealer on the sides of my nose and down the bridge because I blended it out a bit too far but its an easy fix. Just add a bit of the 'Fit Me' concealer and blend it out to get the perfect contour.

To set and deepen the contour, I go in with my NYC 'Smooth Skin Bronzer' in Sunny on my Sigma F05 Small Contour brush. I absolutely LOVE this brush! It is so perfect for contouring. It fits in the hollows of my cheeks so well and it's small size lets you contour your nose and around your face all in one brush! Anywho, I used this everywhere I put the dark cream concealer and also on my jawline.

I honestly don't know what I did without this blush. It is my go to, number one blush from NYX called 'Bourgeois Pig'. I have others but this is ALWAYS the one I grab. It's so pigmented but very build-able. If you use it lightly, like I show in the swatch above, it's a nice natural flush of color. Whereas if you apply it a bit more heavily you'll get a more dramatic affect. For this particular look I lightly applied it with my Sigma F10 Powder/Blush brush. I apply my blush from the apples of my cheeks back to my hairline. I don't like the look of blush when it's just on the apples of the cheeks.

To set the rest of my face, and tone down the blush that I applied a bit too heavily, I use my Rimmel 'Stay Matte' Pressed Powder in 003 Natural. To apply it I use my Sigma F30 Large Powder brush. I swirl the brush around in the product and then lightly press in onto my face and then blend it out.

To highlight I've been using this amazing backed eyeshadow from Klean Color called 'Pearl'. It's the perfect silvery white color. Most actual face highlighters are either pink or yellow toned but I don't like how those look on me personally. I apply this with my e.l.f. Fan Brush along my cheekbones, down the bridge of my nose, a bit on the forehead and chin, and on my cupid's bow.

To lightly fill in my brows I used my 'Brows Now!' by Hard Candy in medium/dark. I ran the product through both of my brows to add a bit of color and to fill in sparse areas. I was going for a natural brow, plus I'm almost out, so I didn't apply a ton, just enough to boost the look. This product is really cool because it has little fibers in it that help give you brows a fuller look and feel.

To give the eyeshadows a good base, I use a small amount of Hard Candy's Eye Shadow Primer called "Eyes The Limit." I've used this for a while and it's pretty good. It keeps the eye shadow in place all day, plus it's only $6. Unfortunately, you can only get Hard Candy at Walmart.

Using my Sigma E55 Eye Shading brush, I applied Last Sin from the Urban Decay Vice 3 palette all over the lid. The photos make it look a bit yellow/orange toned but it's a more of a creamy nude.

Next, I take DTF on my Sigma E25 Blending brush and apply it through my crease and outer 'v'. DTF is what I would call a semi-matte finish. It's matte with small flecks of glitter/shimmer. It's not pure shimmer or pure matte. It looks really shimmery in the pan but when you look at the swatch you can see that the glitter/shimmer doesn't transfer. Then I go back with Last Sin on the center of my lid with my finger to bring back some of the color that was lost from adding DTF.

To add depth to the outer 'v' I use Defy on my Sigma E45 Small Tapered Blending brush. I don't blend it out, I just pat it on.

I next take Truth on my Sigma E35 Tapered Blending brush. I start by running it across my brow bone as a highlight and then use it to blend out DTF and Defy. It's very close to my skin color, just a bit more pink toned. I don't use much so that it doesn't lighten the other colors.
Going back to Defy, I use my Sigma E30 Pencil brush to smoke out the bottom lash line. I start by first adding a bit more to the upper lids outer 'v' and then bring it down onto the outermost part of the lower lid. I pull the color inward from so that it creates a gradient effect.
I don't have a picture of what I used next, mainly because it was a sample but also because you can barely read the writing on it. I applied Mary Kay's Ultimate Mascara in black on my top lashes only.

I always use multiple mascaras so next I take Wet 'n Wild's Mega Volume in black on my top and bottom lashes. I used to use this a couple years ago and LOVED it so I recently repurchased it since I was in need of a new mascara, plus it's only $3. Some people don't like it and they've said it didn't do much for their lashes. I have naturally long lashes so it works great on me. If you've ever used this let me know what you thought of it, I'd love to know.

When I repurchased the Mega Volume I saw Wet 'n Wild's Max Volume Plus in black and decided to give it a go. I applied it to my top and bottom lashes. I'm not sure how I feel about this yet.

Taking my baked eye shadow in Pearl from Klean Color on my Sigma E30 Pencil brush and applied it to the inner corner to highlight and brighten.

Now finally on to the lips! I take a tiny amount of my Nivea Lip Butter in Raspberry Rose Kiss on my finger and rub it in to moisturize and soften my lips in preparation for the lipstick.

Taking Klean Colors Kleanista lipstick called 'Cast of Spell' I apply it straight from the tube all over my lips.

Next I take Revlon's 'Cocoa Craving' and Wet 'n Wild's 'Pagan Angel' from their Fergie line on my Sigma E05 Eyeliner brush. I add a tiny amount at a time and blend them together to create the final look.
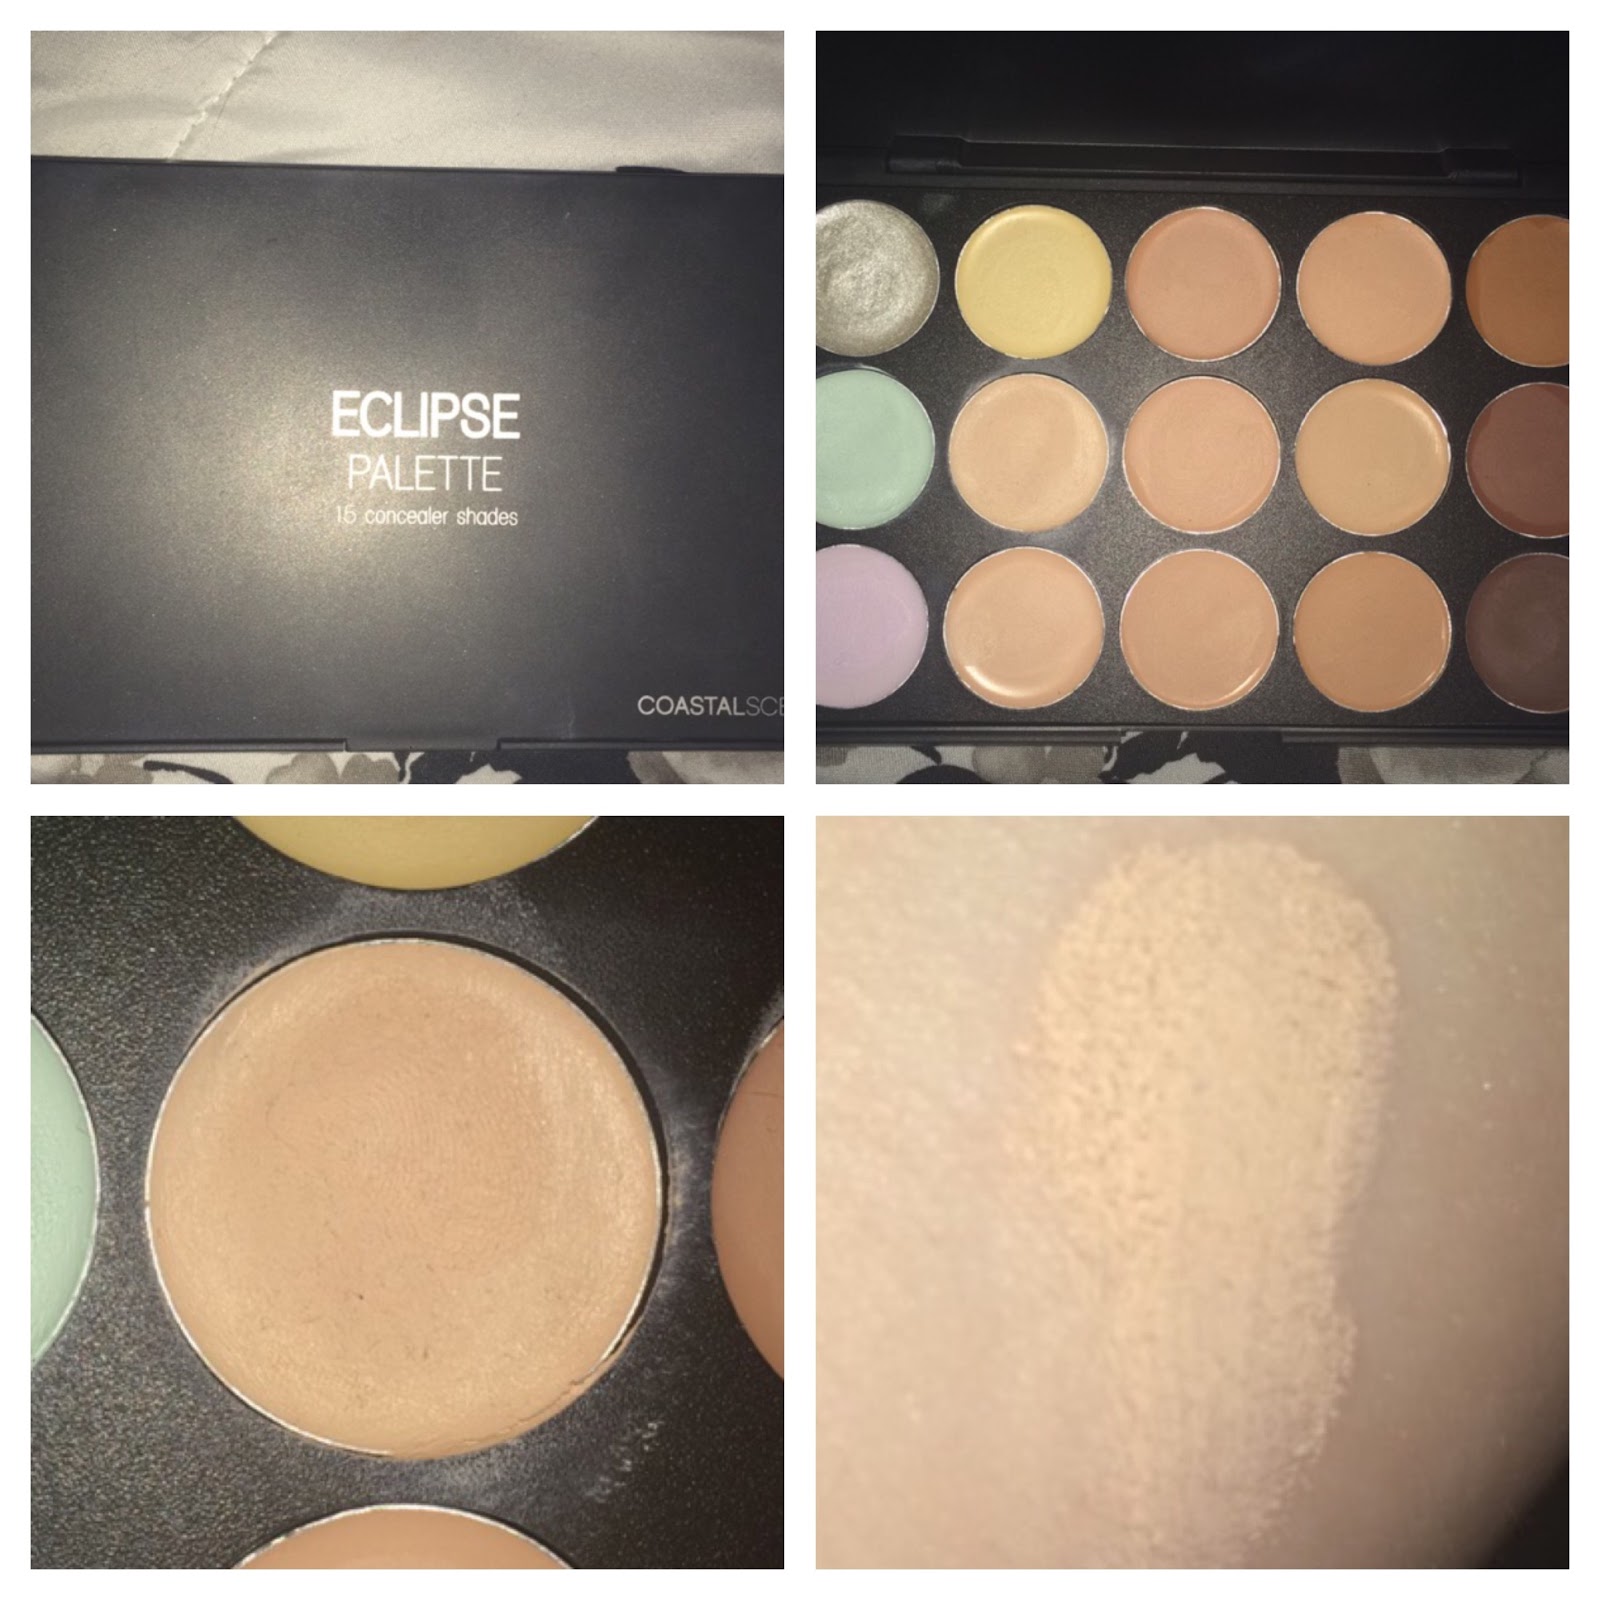
Heading back to my 'Eclipse Palette' from Coastal Scents, I take the lightest skin color on my Sigma F70 Concealer brush and use it to clean up the edges around my lips to give it a sharp, clean look.
And that's it! We're finally done. I hope you enjoy this look. I love the lip combo I created and the eye look is a great look for any and every one. Let me know what you think of this look and what you'd like to see next! I love to hear your opinions :)
xoxo,
Wren


0 comments