Powered by Blogger.

Pages

  • Home
  • Makeup
  • Hair
  • Lifestyle
  • Reviews
  • DIY
  • Contact Me
Facebook Instagram Twitter Pinterest Tumblr

Wrens World


I honestly have no clue how to even begin to explain myself the past 6 months... I just had no motivation or passion for anything. All I did was work and lay around all day watching Netflix. I never really went out and did stuff. No vlogging. No Tweets. No nothing. Ever since my grandpa passed away in April I've been in a severe depression and just feel empty and alone. I've always been an introvert but this was even worse. I can honestly say I don't have any true close friends. I wish I did. There are people I talk to in class and occasionally talk to out of school but I really don't hang out with anyone and it sucks. No one knows how much I actually hate it. I was never an introvert naturally. Being bullied my entire life taught me that this is a cruel unfair judgemental world and I can only trust myself. I have been hurt and had my heart broken too many times to trust people. I've struggled with depression my entire life. Which is pretty damn sad looking back and seeing that that constant sadness I've always felt my entire life is depression. People don't believe me when I say I'm a depressed person. I'm a pretty fucking great actress when it comes to faking a smile and pretending that everything is fine... that I'm fine. But I'm not fine. Everything isn't fine. I feel empty and broken. I feel alone in a crowd. I'm screaming but no one can hear me. I'm dying on the inside and no one has noticed how bad it truly is. I don't talk about my feelings. I can't. I'm an extremely emotional person. Just thinking about something can make me cry for an hour. Saying it out loud... I just can't. I have severe anxiety and my trust issues don't allow me to talk to people. No one even knows how often I really just want to end it all. It's waayyyy too often. Nothing helps. I used to just listen to music and draw which would help. Now nothing helps. I still just lay around watching Netflix but I quit my job so now I never really get out much anymore besides for school. I wish I had someone to hang out with and just chill with. Now with my sister Holly being way out in upper state New York for college I've lost my only close friend. I mean yeah there's Megan but I've always just been closer to Holly. I miss her so much it hurts. I wish I could see her, talk to her, hug her... But I can't. I didn't ever imagine I'd miss her this much. Just sitting her thinking about it is making me cry... No joke. We're so close in age. Her birthday is 11/29/1995 and mine is 11/09/1996. We're the same age for 20 days. Now that my birthday is coming up it sucks. This is the first one I've ever had without her being here. I can't wait for Christmas. She'll be back home and I won't be so alone anymore. I don't know how I'll make it through Thanksgiving though... First one without her or my grandpa. I just don't know how to handle any of this. It all just sucks so much. Life fucking sucks. I need to change that and I'm trying. I just can't seem to fully overcome this darkness. I'm running a never ending race. I can't seem to ever catch a break. I'm never good enough. I'm a disappointment. That's how I truly feel. I feel so alone... I don't want to be alone. I don't like it. I don't know.. I'm gonna try to make videos again and maybe write more on here. I think it might help... Who knows...


-Wren
Share
Tweet
Pin
Share
No comments


All About My Hair

Today I'm going to be talking all about my hair. Everything
I've done to it (within the past year or so) and tell you how 
I take care of it to keep it as healthy as I possibly can! 

Dyeing History

The first time I ever dyed my hair was sometime late November to
early December of 2013. I decided to dye it a burgundy red. 


At the time I loved it but now I regret it so much! It was so beautiful and 
I liked that it was still a dark color but was just more fun. I think
it looked pretty good on me and that most people really liked it. In 
fact, after I dyed my hair that color, I noticed a bunch of other girls
in my school were dyeing their hair the exact same color. Now,
I'm not saying that I'm a "trend setter" or anything, I just thought it
was a bit weird and ironic. The reason I regret doing it is that it's
so difficult to get rid of and keep up with. You have to dye it every
couple weeks, otherwise your roots will look terrible. Then, once
you're over the whole burgundy craze and you want to get rid of it,
it is so difficult! I first tried dyeing it a brown but it stayed red. Then
I tried to bleach it away, didn't work. And finally I tried Color Oops.

This is what it looked like after the Color Oops:

If you're trying to get rid of red hair but nothing seems to work,
I would HIGHLY suggest trying Color Oops. I got rid of all most
ALL of the red. Some was left behind, but it wasn't a lot so I just
left it. If I wanted it gone fully, I could have done it a second time
and it probably would have taken it all away and left my hair blonde.
One thing I'd like to say though, is if you only lightened your hair,
it won't work on you. Bleaching your hair changes the actual hair color
where as dyeing your hair darker or to a red or something like that, just
covers your hair and is why it slowly fades in intensity over time.
Also, Color Oops is for semi-permanent or permanent hair dyes.
If you used a temporary hair dye it tells you that it won't work.
If you want to know more about it you can look it up.

How it is Currently Cut

If you like my current hair cut (the first picture in this post)
and would like something similar, this is what I asked for:
something shot but still able to be pulled up, layers, have the
hair around my face cut to frame it, and to have the layers
flow together so it's not obvious where each layer ends. 

Damage I've Done

So, I've dyed it red and then re-dyed it red once or twice.
Then I bleached it twice. The first time didn't work so I did it
again... still didn't work. Then I did color oops once, had some 
left over and did it a little more a few days later. But the thing
that has damaged my hair the most is my job. I'm a lifeguard and
swim instructor so I'm in the chlorinated pool all the time. After
dyeing your hair, most people say that their hair is very dry, brittle,
crunchy, etc. But for me it felt just a tiny bit more dry than usual.
As for the chlorine, that's what has ruined my hair. If you're a 
swimmer or go to the pool a lot in the summer, you'll understand.
The chlorine dry's out my hair so much, builds up on my hair quite
quickly, makes my hair more frizzy, and breaks easily. 

What I do to Protect it

To protect my hair from the chlorine, I try to get my hair wet before
I get in the pool but usually I forget to or am in a rush and just don't.
You can also put conditioner in your hair before you get into the pool
and it will help block the chlorine from absorbing into your hair.

Healing After the Damage

After the damage is already done, there isn't much that can be done.
But to help it from getting worse, I wash my hair out after each time
I'm in the pool. I use Aussie's Miraculously Smooth line at work.


I work Monday-Friday and shampoo and condition my hair
two times a day. Once before I leave for my lunch break and
again at the end of the day before I go home. On the weekends
I give my hair a break and wash it either Saturday night or
Sunday morning. Using Tresemme Anti-Breakage line.


To help my hair further I use two leave in products.
The first is Garnier Fructis Sleek & Shine leave in conditioner
and the second one is from the same line but is their Moroccan
Argon Oil. I use both together after I shower and my hair has
dried a little but it still wet. Then I use the oil again at night by
itself. I use a spray bottle to get my hair wet and then put
a little bit of the oil on the ends of my hair.


In Conclusion

I sometimes wish I had never dyed my hair, but I'm glad I did.
I probably won't ever go red again and have learned a lot from
all of the things I've done to my hair. One, don't be cheap when
it comes to hair dye. Two, if you're doing it yourself look up how
to do it or read up on some helpful tips and tricks. Three, don't
be afraid to ask for help. Four, make sure you're absolutely sure
it's what YOU want and not what others think you should do. 
It's your hair and you're the one who has to live with it. Also,
if something does go wrong and your hair turns orange, go to
a professional after you've done everything you can. If you do
go to a professional, make sure you do your research. Ask 
around to see it he or she is any good, how long they've been
doing hair coloring, etc. And finally, don't worry. It's just hair.
If it turns out bad you can re-dye it or just live with it. You 
never know, something you think is a mistake might turn
out to be something beautiful that you love :)


xoxo,
Wren
Share
Tweet
Pin
Share
No comments

Hey Everyone!
Today I'm going to be showing you how to create
this gorgeous look that's sweat-proof and tear-proof.
First off I want to say that this isn't going to stay no
matter what. It's more of a water resistant look. If you
are going to be swimming for hours or crying nonstop,
then some of the color may fade or kind of shift around.
No makeup look is 100% water proof, it just resists 
and won't move around quite as much as other 
ways of wearing makeup.

Video:


Products Used:

Urban Decay - 
Naked 2 Palette

Maybelline - 
Color Tattoo: 
Tough as Taupe

Rimmel -
Match Perfection Concealer:
Fair/Light (230)

Flower Beauty -
Cream Blush:
Pure Petunia

Rimmel -
Kohl Pencil Eyeliner:
Black

Salon Perfect -
Brow Kit

Sally Hanson -
Eyelash Curler

L'Oreal -
Water-Proof Mascara:
Black

Rimmel -
Lipstick:
Airy Fairy

NYX -
Butter Gloss:
Vanilla Creme Pie

EYES:

Step One:
To prime the eyelid and give it a nice base for
the shadows that will go on top, I used this
Maybelline Color Tattoo in Tough as Taupe.
I used a clean finger to apply it all over my
eyelid and then used a stiff blending 
brush to help blend the color out.


Step Two:
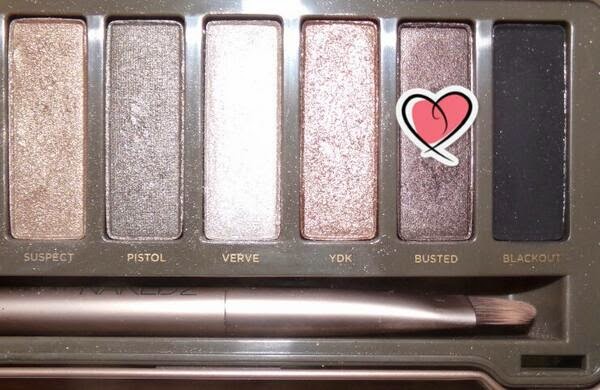
Going to my Urban Decay Naked 2 palette, I 
used the color Tease and applied it all over 
the lid to set the cream eyeshadow base.
Tease is a matte grey taupe that is almost
the same exact color as the Maybelline
Color Tattoo that I used as a base.


Step Three:
Taking the light metallic silver called Verve, I 
applied it lightly to the ball of the lid and 
a bit into the inner corner.


Step Four:
Going in with a fluffy shader brush, I took this 
dark purply brown shade into the outer v and
through the crease to add some depth.


Step Five:
Next I first took the shade Foxy and put it in 
the inner corner and brow bone to lighten and 
then took the color Bootycall to highlight 
and add some shimmer.


Step Six:
To finish off the eyes, take a black kohl eyeliner
pencil and tight line your eyes. This is when you
put eyeliner on the waterline but on your upper
lash line. Then, curl your lashes and apply a few 
coats of your favorite waterproof mascara.


FACE:

Step One:
Since this look is sweat and tear resistant, we don't
want to cake on the face makeup. I myself have pretty
decent skin so I don't need much coverage. I just used
a concealer under the eyes and on any blemishes or
redness that I want to cover up. But, if you don't have
the best skin and need more coverage, I'd say go for
a BB or CC cream along with the concealer in problem
areas. It will give you the extra needed coverage, but
won't be quite as caky as a full on foundation. If you
have really oily skin I would suggest using a pressed
powder to set your makeup as well. I have pretty 
oily skin but skipped that step so I wouldn't 
have as much makeup on my face.


Step Two:
To add some color to the face I used this gorgeous
cream blush. Using all cream products will help your
 makeup stay all day. Powders fade and move around 
on your face more easily than a cream or liquid 
so keep that in mind.


Step Three:
To finish off and tie everything in together, fill
in the brows. If you've never done this before you'll
be surprised of the difference it makes. It really just
helps everything flow together and look polished off.
I use a combination of the two darkest colors since
I have naturally dark hair and eyebrows. To fill them
in I used the angle brush the kit comes with and then
brush them into place with the other end of the angled
brush. To set them in place, I used the wax stick.

More Pictures:


And That's It!
I really hope you enjoyed this and found it helpful.
If you have any suggestions, questions, or even just a 
something you want to tell me, let me know in the 
comments down below. Also, don't forget to follow my 
blog so that you can know when I have a new post up 
and share! It would mean the world to me if you do :)


xoxo,
Wren
Share
Tweet
Pin
Share
No comments

Hi Everyone!
Today I'm going to be showing/telling you how to achieve
this gorgeous makeup look. It's very simple and natural
so it's perfect for a bride who just wants to 
enhance her natural beauty.

Video


Products Used:

Rimmel-
Match Perfection
Concealer/Highlighter
in 125 & 230

Salon Perfect-
Brow Kit

Flower Beauty-
Creme Blush
Pure Petunia

NYC-
Smooth Skin Bronzer
Sunny

Maybelline-
24hr Color Tattoo
Barely Branded

Wet n' Wild-
Eyeshadow Trio
Silent Treatment

Rimmel-
Gel Eye Liner
Black

Sally Hanson-
Eye Lash Curler

Jordana-
Best Lash Extreme
Volumizing Mascara

Revlon-
Lip Butter
Berry Smoothie

Benefit-
Highlighter
Watt's Up


Step One: Face
Use the lighter concealer under the eyes, down the nose,
on your cupids bow, and a bit on the forehead to highlight.
Then with the darker of the two, the one that matches your
skin, conceal any redness or spots that you want to cover.
Using the blush lightly dap it onto your cheeks and blend 
it out with your fingers or a sponge. Take the bronzer on
an angled brush and lightly bronze/contour your face. 
Fill in your brows with powder using short small strokes
to make it look like little hairs and then set them 
in place with a clear or tinted brow wax/gel.


Step Two: Eyes
To start off take the Maybelline Color Tattoo in Barely
Branded on your finger and put it all over the lid with your 
finger. Next, take the purpely-grey taupe color from the Wet 
n' Wild trio Silent Treatment and put it on your outer "v" and 
on your lower lash line. Then with the lightest color in the trio 
lightly pat it on the center part of your lid. With the black gel eye 
liner line your upper lash line as close to the lashes as possible. 
Finally, curl your lashes and apply a couple coats of 
mascara to your top and bottom lashes.


Step Three: Finishing Touches
To finish off, take the Revlon Lip Butter in Berry
Smoothie and applied it to your lips. Then to highlight the
face, use Benefit's Watt's Up and put it wherever you 
want your face to be brighter or reflect the light. I put
it on my cheek bones, a bit down the nose, on the
cupids bow, and on the brow bone.


Pictures of the Completed Look:


That's It!
I hope you found this helpful if you're a bride to be
or going to prom and need a makeup look for your 
special day! If you did let me know in a comment
down bellow and share this so your friends can see!
Also, comment what your wedding or prom 
dress color is! I'd love to know :)


xoxo,
Wren
Share
Tweet
Pin
Share
No comments

Cell Phone Cases


Hi Everyone!
Today I 'm going to be doing a little review/ first
impression. I've heard about Born Pretty before but 
had never gone to their website and actually 
looked at what they have to offer.


What is Born Pretty?
Born Pretty is a wholesale retailer.

What's a Wholesale Retailer?
It's cutting out the middle man. You're
buying directly from the producer therefore
you can buy things that are good quality 
for a very low price.

What Do They Sell?
Makeup
False Lashes
Nail Polish
Nail Art Tools
Jewelry
Clothing
Accessories
Hair Products
Extensions
Cell Phone Cases
Contact Lenses

Overall Opinion
This is a really great site from what I've gotten.
I've only got the cell phone cases but I just placed
another order so I will do another video and post
when it gets here. One bad thing is that it's based
out of China so it takes 4-6 weeks to get here.
But since I get it for such a low price PLUS free
shipping I don't mind much. Also, what I do buy
isn't anything super important or meant to be a 
gift so I don't mind having to wait. Plus, if you're
like me and don't remember everything you
bought it's like a nice little surprise 
when it finally does get here.

Would I Buy From Them Again?
YES! Even though I do have to wait
quite a long time for it to get here, the low
price and nice quality is definitely
worth the wait.


I hope this was helpful or informative. If you liked this don't forget
to follow me for more post! :) Anyway, I will see you guys next time!


xoxo,
Wren
Share
Tweet
Pin
Share
No comments


Hi Everyone!
So today I'm going to be showing you what's in my purse!
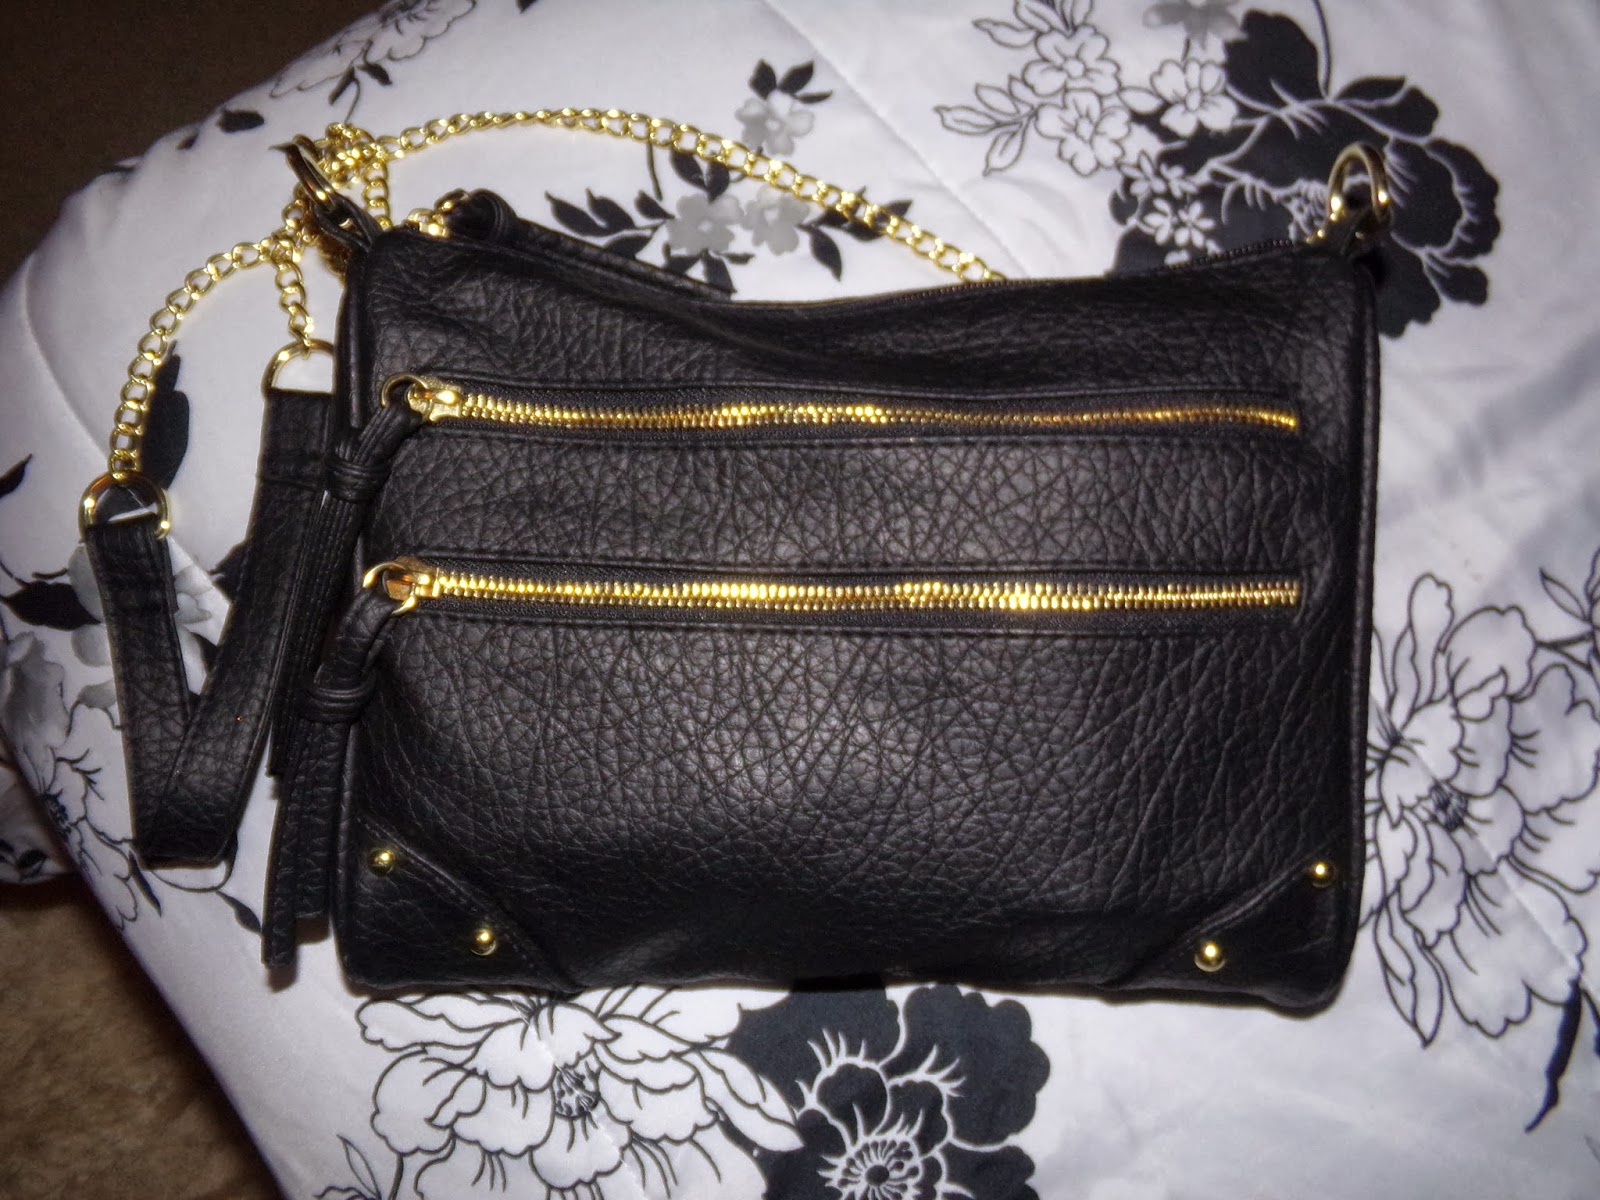
I don't like to have a huge bag that's overflowing with stuff so
I like to stick with smaller bags. Also, I like to stay with neutrals
 colors. I don't think a bright neon pink purse is very versatile.
 It's harder to use on a daily basis and if it's not something
I can use daily then I usually won't buy it. But if you love
your bright neon purse and want to use it everyday then
you rock it girl! I know I never could. Hahaha

Video


What's in my purse?


So the bottom zipper on the front doesn't work. It's functional
but it always gets stuck. If you zip it closed 95% it won't unzip
without having to pull on it for 10 minutes and almost rip the
entire thing out so this is what's in the top one. I keep a
Germ X in there along with my phone, keys, and earbuds.
At the time though I only had the Germ X since I was home
 and my earbuds broke. It's really handy for easy access
so that I don't have to dig through the stuff in the main
compartment just to get my keys or whatever.


This is what the main compartment look like. I'm not going
to go into detail since I have a separate picture of each
thing in that's in it.


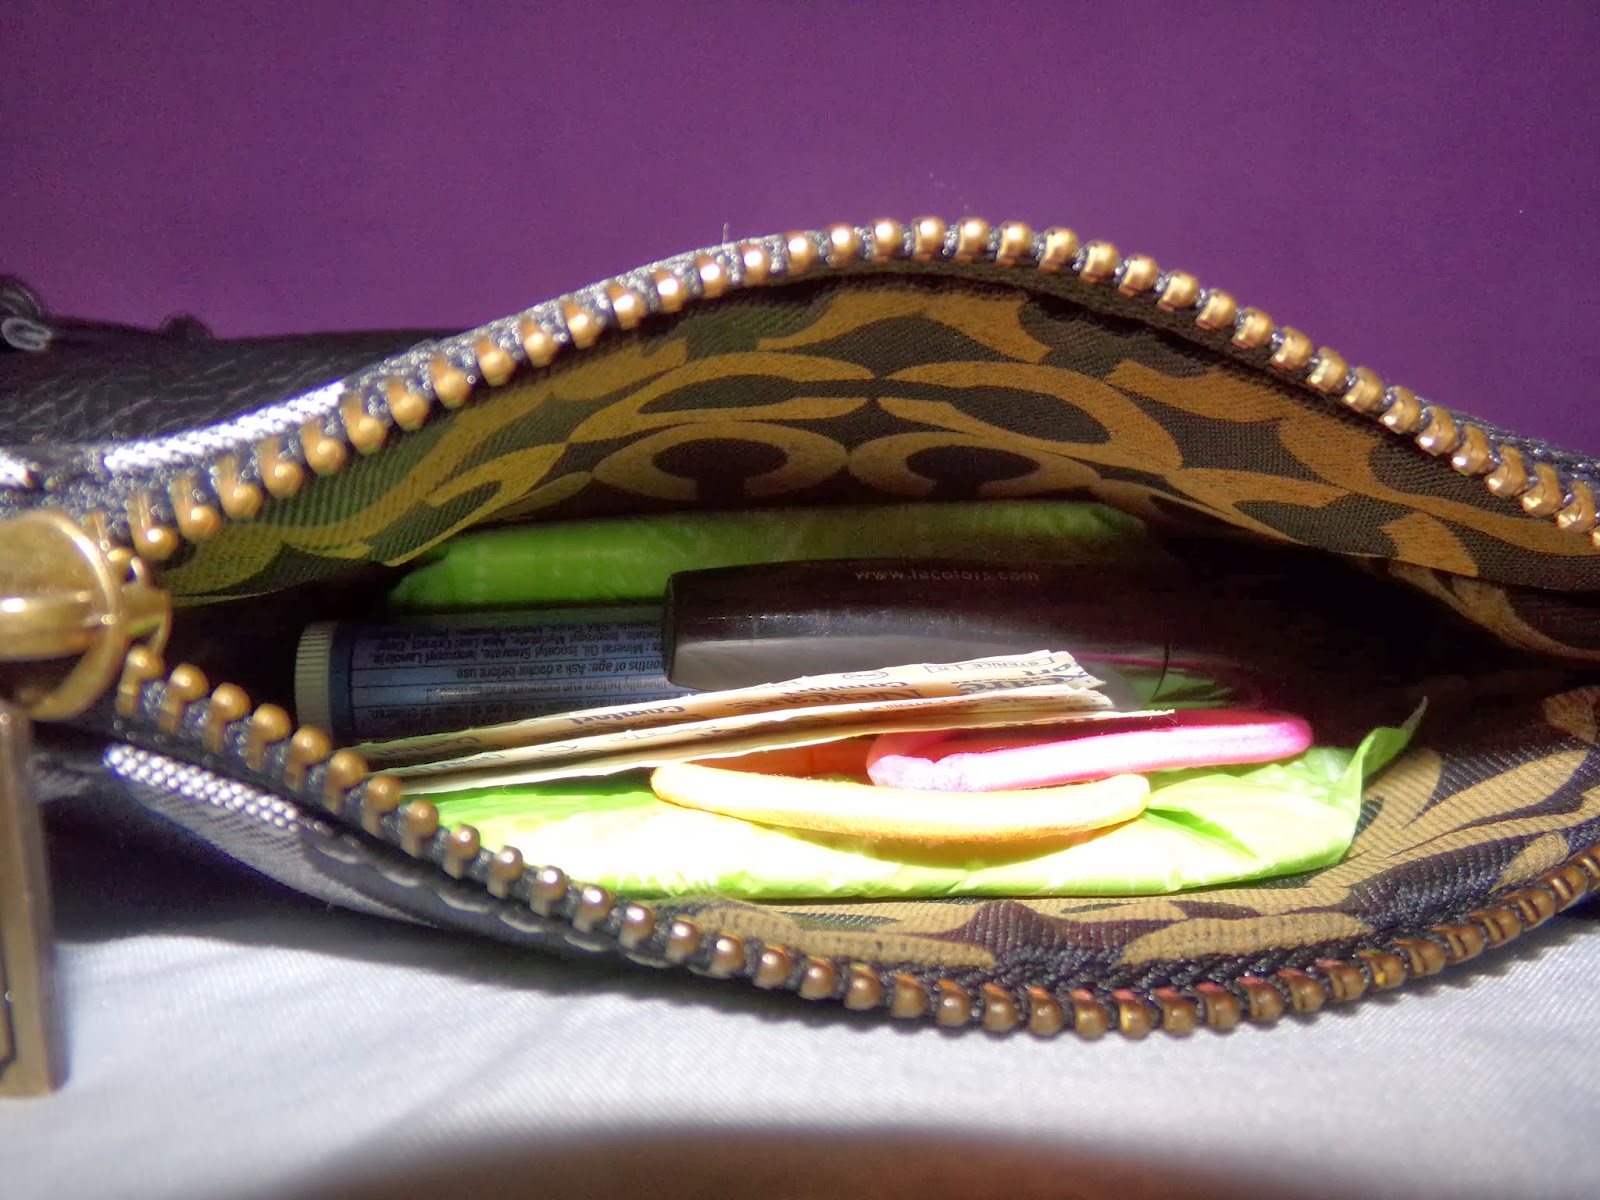
This is a random old Coach pouch. I'm not sure exactly
what it is but I use it for my "personal" items. In it  I
have a pad, hair ties, a mascara, a chap stick, and a
few band-aids. It's sort of a little emergency kit.


This is what my wallet looks like from the front. Its has
a magnetic closure and on the back there's a little
zipper compartment where I keep my change.


This is what it looks like on the inside. on the front (bottom
of the picture) is a clear compartment. I put my license and
lifeguard/first-aid/CPR/AED certification. Then in the open
 area I keep my cash and in the card slots I keep my debit
card, Shopko savings card, and AERewards card.


 This is the rest of the stuff I keep in my purse.
Tissues, lotion, and a flashlight.


This was totally random but since I made a video on it I thought
I might as well make a blog post on it too! Hahaha Anyways I
hope this was interesting and maybe helpful if you weren't
sure on what to put in your purse. I know when I was younger
and had little purses I never knew what to put in it. Usually
I just left it empty and carried it around to be like my mom
or my older sister who both had purses. Did you do that too?
Or was it just me? Hahaha let me know in the comments
down below! I'd love to know :) And while your at it
leave me any suggestions or requests for future
blog posts. I'll see you guys later! :)


xoxo,
Wren
Share
Tweet
Pin
Share
No comments


Hi Everyone!

Today I'm going to be sharing with you all of the 
products I use in my skin care routine. I use quite a few
products but not as much as some. This combination 
has worked great for me but I can't guarantee 
that it will work for you too. 

Video

PRODUCTS I USE:

Makeup Remover(face): 
Equate Beauty - Original Clean
Wet Cleansing Towelettes

Makeup Remover(eyes):
Rimmel London - Just Let It Go
Gentle Eye Make Up Remover
(on a cotton round)

Face Mask:
Freeman - Facial Clay Mask
Avocado & Oatmeal

Cleanser:
Clean & Clean - Deep Action
Cream Cleanser
(with a spin brush)

Eye Cream:
Garnier - Ultra-Lift
Anti-Wrinkle Firming Eye Cream

Astringent:
Clean & Clear - Essentials
Deep Cleaning Astringent
(on a cotton round)


Step One:
Remove any makeup you have on. This seems
pretty obvious but often gets overlooked by many.
Sleeping in your makeup is one of the worst things
you can ever do to your skin. At night while you sleep,
your skin is repairing it. You don't want a film of makeup
on you skin when going through this process.


Step Two:
Face Mask. I like to use a face mask at LEAST once a
 week. It helps clean deep down to your pores, leaving
 your skin feeling clean and refreshed. I use it about every 
other day but wouldn't suggest using it more than that. 
Face mask come in a variety. Some are clay based,
 others you just peel off. Depending your skin type
some will work better than others so I suggest reading
up on what will be the best for you and trying a few out.


Step Three:
This is honestly one of the most important steps.
Along with the cleanser I use a spin brush. This cleanser
works great for me, but I have to give a LOT of credit to
the spin brush. The bristles reach down into your pores 
a million times better than what you do with just your
finger tips. If you have very acne-prone skin I think
that this might help. I have a friend who's very acne-prone
 and has helped clear her skin up quite a bit. Plus, it's a lot 
cheaper than a Clarisonic and if it doesn't work for you
or you just don't like it you didn't spend as much money 
on it as you would have with the Clarisonic.


Step Four:
Eye cream. You don't need it but if you're around
the age of 23 I suggest starting to use one to help 
prevent premature wrinkles. I'm only 17 but since I
wear makeup all over my eye area my under eyes have
been noticing a few fine lines so i decided to start using
one. I haven't been using it for very long, about 2 weeks,
so I'm not sure how well this particular one works. Plus,
I only use it at night before I go to bed. One thing I have
noticed is my eyelashes. Ever since I first started using this
they have been a lot longer, thicker, stronger, and overall 
just a lot healthier. I had been wearing a lot of mascara on 
a daily basis and noticed that after about a week or two
my lashes were shorter and more brittle. But then when I
started to use an eye cream they got nice and strong again.
So if you're a daily mascara wearer and have noticed that 
your lashes seem a lot shorter and more brittle than the have 
been in the past maybe using an eye cream will help bring back
some moisture to your lashes while helping with wrinkles.


Step Five:
To finish off I use an astringent. I'm still not 100%
sure what it is meant to do but I have seen a difference.
I don't get a lot of pimples but this is amazing for them.
The day I got this I felt a pimple coming on, the are was sore
 and felt hard,  I put some of this on it. When I woke up the
next morning it was gone. No joke. It was completely gone!
That is amazing. I also had a pimple that had already surfaced
so I put some of this on there too and two days later it was 
gone too. The only down side of this product is that it
has an intense chemical scent. It has salicylic acid in it
along with "acne medication" so I assume that's the 
cause of the strong scent.


And that's it! That is everything that I use on my skin on a daily
basis. It works wonders on my skin and I hope that this was helpful.
I have oily skin and it isn't sensitive so I can be kind of rough with it.
If you have more sensitive skin the only product that is harsh on the skin
would be the astringent so you can skip that step. Plus they're all drugstore 
products so their easy to find no matter where you are. But overall I really like 
all of these products and would suggest them to everyone. If you have any 
questions please feel free to ask me in the comments down bellow! :)


xoxo,
Wren
Share
Tweet
Pin
Share
No comments
Newer Posts
Older Posts

About Me

About Me
Just your average young adult trying to figure out life while taking all of you on the journey with me.

Followers

Follow With Bloglovin

Follow

Follow Me

  • 190 Subscribers
  • 7000 Followers
  • 95 Followers
  • 98 Followers
  • 15 Followers

Popular Posts

  • Lime Crime Giveaway! (Now Closed)
    a Rafflecopter giveaway Giveaway will close January 1, 2016 at 12am central time Rules: You MUST be 18 years of age or older OR h...
  • Where to get Lime Crime and Jefree Star Cosmetics Discounted?!
    Have you always wanted to try Lime Crime, Jeffree Star Cosmetics, Sugar Pill, Manic Panic, and so many more makeup brands but don't...
  • Dusty Road | Current Go To Makeup Look
    Above is my most recent YouTube video. I show you my most recent go to makeup look. It's super simple, easy, and modera...
  • Gallbladder Surgery
    As I have previously mentioned, I took some time away from social media for my personal life but also because of my health. I'...
  • Au Pairing | Traveling Abroad
    As I said in a couple post previous, I talked about studying abroad and trying to figure out what I want to do with my life. I've...

Blog Archive

  • ►  2017 (9)
    • ►  March (9)
  • ►  2016 (5)
    • ►  September (1)
    • ►  March (3)
    • ►  January (1)
  • ►  2015 (13)
    • ►  December (1)
    • ►  November (3)
    • ►  October (2)
    • ►  September (6)
    • ►  August (1)
  • ▼  2014 (16)
    • ▼  November (1)
      • Life Isn't Always So Great
    • ►  June (1)
      • Hair Care Routine | Very Damaged Hair
    • ►  April (1)
      • Sweat-Proof and Tear-Proof Makeup Tutorial
    • ►  March (3)
      • Bridal or Prom Makeup Tutorial
      • Born Pretty Store | First Impression
      • What's in My Bag Tag
    • ►  February (10)
      • Oily Skin Care Routine

Created with by ThemeXpose