Powered by Blogger.

Pages

  • Home
  • Makeup
  • Hair
  • Lifestyle
  • Reviews
  • DIY
  • Contact Me
Facebook Instagram Twitter Pinterest Tumblr

Wrens World


So this is my new makeup organizer and I'm completely obsessed and in love. It's absolutely beautiful and holds so much. Whether you're just starting your collection, looking to add another unit to your collection, or want to upgrade your storage system, I would highly recommend this unit. It's very high quality and since it's clear it's easy to find what you're looking for.

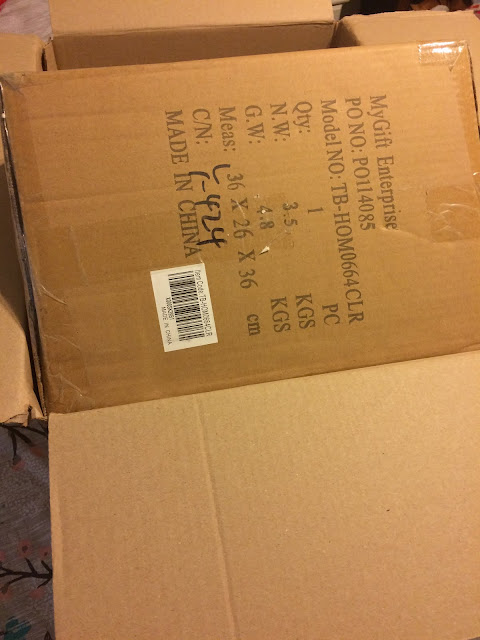
Shipping was super quick and free. It was very well packed and was double boxed. The unit itself was wrapped in cling film and had Styrofoam around the edges to protect it.


(upsidedown)

The unit has 4 draws that can be removed completely and the top has lid. The lid can be folded all the way back so that taller products can be placed here or you can store them upright instead of on their side in one of the drawers and is about 2.5 inches. The bottom drawer is deeper than the others (2.5in) and is great for palette storage. The middle three are all the same depth(1.5in) and are great for more/smaller palettes, single eyeshadows, lip and eye liners, face products, really anything you want.

(right way up)


Overall this is the best storage unit for the price ($69.99) and is amazing quality. There are so many units like this for so much more money and probably just as nice as this. I've seen some that are less but don't have the lid or are a lot smaller so I highly recommend you check it out. Whether your makeup collection is just getting started or you're looking to upgrade your current organizer, this is worth considering. Plus, since it's clear it's easier to find what you're looking for quickly and easily. If you'd like to check it out here's the link:
http://www.amazon.com/gp/product/B00ZBYCJ7C?psc=1&redirect=true&ref_=od_aui_detailpages00

Want to see what's in it? Check out my video!


xoxo,
Wren
Share
Tweet
Pin
Share
No comments


Choosing the proper cosmetics can be hard and confusing but is completely worth it in the end. The right cosmetics can take you from being borderline Oompa Loompa or chimney sweep to the true beauty you are. First you need to know the different products, what they are for, and where to apply them. But before you get to applying anything, you need to find your skin tone which is key to not looking like an Oompa Loompa or chimney sweep. Once you find you skin tone and get an understanding of the basic face products, the rest is easy. This all may be a bit confusing or hard but it’s worth it.

First, a brief background on the products that will be discussed, foundation, blush, bronzer, and eyeshadow. Foundation is most commonly found in liquid or cream form and is applied to the entire face. It’s purpose is to even out the skin and blur any imperfections. Then there is blush, also know rouge, which is applied to the apples of the cheeks (the chubby circular part emphasized when you smile) to warm up the face and give a natural glow or flush. Now for contouring. Contour can be liquid but is more commonly a pressed powder or cream that is two to three shades darker than your skin and is applied to the hallows of the cheeks to give a more sculpted appearance. To find the area to apply contour, suck your cheeks in making a fish face, the part sucked in is where contour should be applied. Eyeshadow is most commonly a pressed powder but you can also get it as a cream or loose powder and is applied to the eyelids to enhance your natural eye shape and color. Combine all of these together properly and you’ll be a show stopper.

No onto the most important part, what the different skin tones look like and how to find which one you are. The three different skin tones are cool, neutral, and warm. Cool tones are pink based, warm tones are yellow based, and neutral tones are in between. Now, how to find which you are. The first, and simplest, test is to just stand in front of a mirror, look at your skin and see if you have more pink undertones or yellow undertones. If you’re more pink then you’re likely cool but if you have more yellow undertones then you’re more likely warm. Sometime holding up a blank piece of white paper will help because you can compare your skin to the stark white paper and see if you’re more pink (cool) or yellow (warm). Not many people can tell from just looking at their skin so there’s the vein test. Look at the veins running down your arm. If they look very blue you're cool, while very green looking veins are warm, and then teal looking veins are neutral. Hopefully you’ve figured out which you are but if you’re still not sure, try warm skin toned products (they tend to be more flattering) but if you look too yellow then you’ll know you’re cool toned. Your skin tone is what you base all of your face products off of which is why it’s so important.

Now for the fun part, choosing new makeup that will enhance your natural beauty but also fits your skin tone. For foundation you want it to blur imperfections and smooth out any unevenness your skin may have so choose on that is the same as your skin tone. As for blush you want to choose the opposite. If your skin is already pink from being cool or yellow from being warm you don’t want to draw focus or add to it. Good colors for cool toned people are peaches or anything orange based while pinks and purples are best if you’re warm. If you’re neutral you’re lucky and can where whatever color you want. Contour is like foundation, you want to choose the same as your skin tone but two to three shades darker than your skin. If you’re cool you’ll want on that has a grey undertone. Using a bronzer or contour that is too warm can make it look like you have orange streaks on your face. If you’re warm toned then you’ll want the bronzers and orange based contour. When a warm toned person uses a cool toned contour it will be very grey, giving a dirty or even sickly appearance to the skin. If you’re neutral, you get to choose which you prefer, just make sure it all goes together. So to summarize, foundations and contours should be the same as your skin tone while blushes should be the opposite.

Now that you’ve got the face mastered we can learn how to make your eyes stand out. Choosing eye shadows that will make you eyes pop is like choosing blush, you want to use the color opposite your eye color or the color wheel. So if your eyes are blue, use orange, peach or even an orange based gold. Red is opposite green so try using red, pink, or even violet shades. Brown eyed people are lucky like neutral skin toned people because you can use any color you want. These are just how to make you eye color stand out more but you can rock whatever colors you like.


So now you’ve learned it all. From finding your skin tone, the correct products to use, why it’s all important, and how to make your eye color stand out. No one wants to look like an Oompa Loompa or chimney sweep and now you have the knowledge to not only avoid it but also change it if you hadn’t been using the correct products. Choosing the correct makeup products might be hard, confusing, or even intimidating, especially if you’re new to makeup, but it’s worth it to enhance your natural, beautiful self.
Share
Tweet
Pin
Share
No comments


Before we even get started, I am not a certified cosmetologist or hair scientist, just a girl in cosmetology school. I started back in mid January and we recently learned how to shampoo the hair and the science behind it which is what I am going to share with you. This is how shampooing and conditioning should be done.

First, the steps!

1.) Dampen the hair with warm water
2.) Take a small amount of shampoo and apply it near the hairline and work it throughout the rest of your hair. Focus on really massaging it into your scalp to remove the sebum(oil) buildup for a good cleaning.
3.) Rinse out the shampoo.
4.) Repeat steps 2-3.
5.) Apply a small amount of conditioner to the ends of your hair and run whatever may be left through the rest of your hair. 
6.) Rinse out the conditioner in cool water.
7.) And you're done!

Next, the science!

1.) You want the hair to be wet so that you can use less product and to help it glide through the hair with ease and to help open up the cuticle. Use warm water to open the hair cuticle so that the shampoo can penetrate the hair to remove dirt, oils, and product buildup.
2.) When you apply shampoo to the hair, it penetrates into the hair and makes dirt, oils, and product build up to cling together in little balls.
3.) Rinsing out the shampoo rinses out the dirt and oil that balled up from the shampooing process.
4.) You want to repeat steps 2-3 to ensure you have removed all of the gunk in your hair since most of the time the first shampoo doesn't get it all. The second shampoo should cause a big lather, meaning the shampoo bubbles up a lot. Then you rinse the shampoo, and any remaining dirt or oil, out of your hair.
5.) As you hopefully remember, when we first started the cuticle layer of the hair was raised in order for the shampoo to penetrate into the hair and remove dirt and oil. Now we need to smooth done the cuticle, closing the hair shaft. To do so we use conditioner. This is, to me, the most important part of cleaning your hair. If you don't use conditioner, your cuticle remains up causing frizzy, dry hair. It not only smooth down the hair but it also adds shine. Plus, if your cuticle is down your hair will also feel much softer. However, if you apply it scalp to ends it can make your clean hair look oily and dirty after you've just washed it. That's why conditioner should be focused on the ends and lightly applied the closer you get to the scalp.
6.) Rinsing in cool water will help seal down the cuticle, helping the hair to be even smoother and softer.
7.) All Done!

Like I said earlier, different things work for different people. However, this is how hair washing should be done. I will have another post with my opinion on some of these other ways I've been seeing recently but if you want your hair to get cleaned well and be soft and silky, I suggest trying this method. There are many different hair types and so many different shampoos and conditioners so depending on yours I also suggest trying out some different ones since each one will do something different to your hair. If you have any questions or requests let me know and I'll do my best!


xoxo,
Wren
Share
Tweet
Pin
Share
No comments
Newer Posts
Older Posts

About Me

About Me
Just your average young adult trying to figure out life while taking all of you on the journey with me.

Followers

Follow With Bloglovin

Follow

Follow Me

  • 190 Subscribers
  • 7000 Followers
  • 95 Followers
  • 98 Followers
  • 15 Followers

Popular Posts

  • Lime Crime Giveaway! (Now Closed)
    a Rafflecopter giveaway Giveaway will close January 1, 2016 at 12am central time Rules: You MUST be 18 years of age or older OR h...
  • Where to get Lime Crime and Jefree Star Cosmetics Discounted?!
    Have you always wanted to try Lime Crime, Jeffree Star Cosmetics, Sugar Pill, Manic Panic, and so many more makeup brands but don't...
  • Dusty Road | Current Go To Makeup Look
    Above is my most recent YouTube video. I show you my most recent go to makeup look. It's super simple, easy, and modera...
  • Gallbladder Surgery
    As I have previously mentioned, I took some time away from social media for my personal life but also because of my health. I'...
  • Au Pairing | Traveling Abroad
    As I said in a couple post previous, I talked about studying abroad and trying to figure out what I want to do with my life. I've...

Blog Archive

  • ►  2017 (9)
    • ►  March (9)
  • ▼  2016 (5)
    • ►  September (1)
    • ▼  March (3)
      • Acrylic Makeup Organizer Review
      • Choosing the Proper Cosmetics
      • How to Properly Wash Your Hair
    • ►  January (1)
  • ►  2015 (13)
    • ►  December (1)
    • ►  November (3)
    • ►  October (2)
    • ►  September (6)
    • ►  August (1)
  • ►  2014 (16)
    • ►  November (1)
    • ►  June (1)
    • ►  April (1)
    • ►  March (3)
    • ►  February (10)

Created with by ThemeXpose